Freddies handmade jewellery

Thursday, 7 March 2019

Macrame Gold and Silver Cowry (Cowrie) bracelets now on Etsy

Well this is a new one! I've always loved seashells, collecting them when I was a little girl. I've always found them fascinating and was secretly disappointed that I couldn't meet the incredible creatures that lived inside.

No different to my current love of fossils and all things faunatical, I suppose.

Seashell bracelet on knotted black cord with gold shell
So when I started seeing seashell beads and how cost-effective they are, I couldn't resist making a bunch for my etsy shop.

My mother-in-law is always complaining about fiddly clasps and I must admit, I can't do up a bracelet myself if it's got a lobster clasp. I need help. So I've made these with adjustable pull-knots.

I did try matching spacer beads instead of glue-sealed knots but they just looked so clunky and heavy I rapidly fell out of love with them and opted for the simplicity of knots instead.

handmade white, silver and black seashell bracelet on grey background

I generally don't wear gold, but I think the gold ones are so far, the prettiest. The antique silver ones aren't 925 sterling silver and the beads are a touch flatter, but they're still lovely. I am currently working on sourcing some more 3D, polished 925 silver versions.

I experimented with a few different cords before I found one I was happy with. I tried waxed cotton cord that was quite thick, which looked nice but was very chunky and heavy.

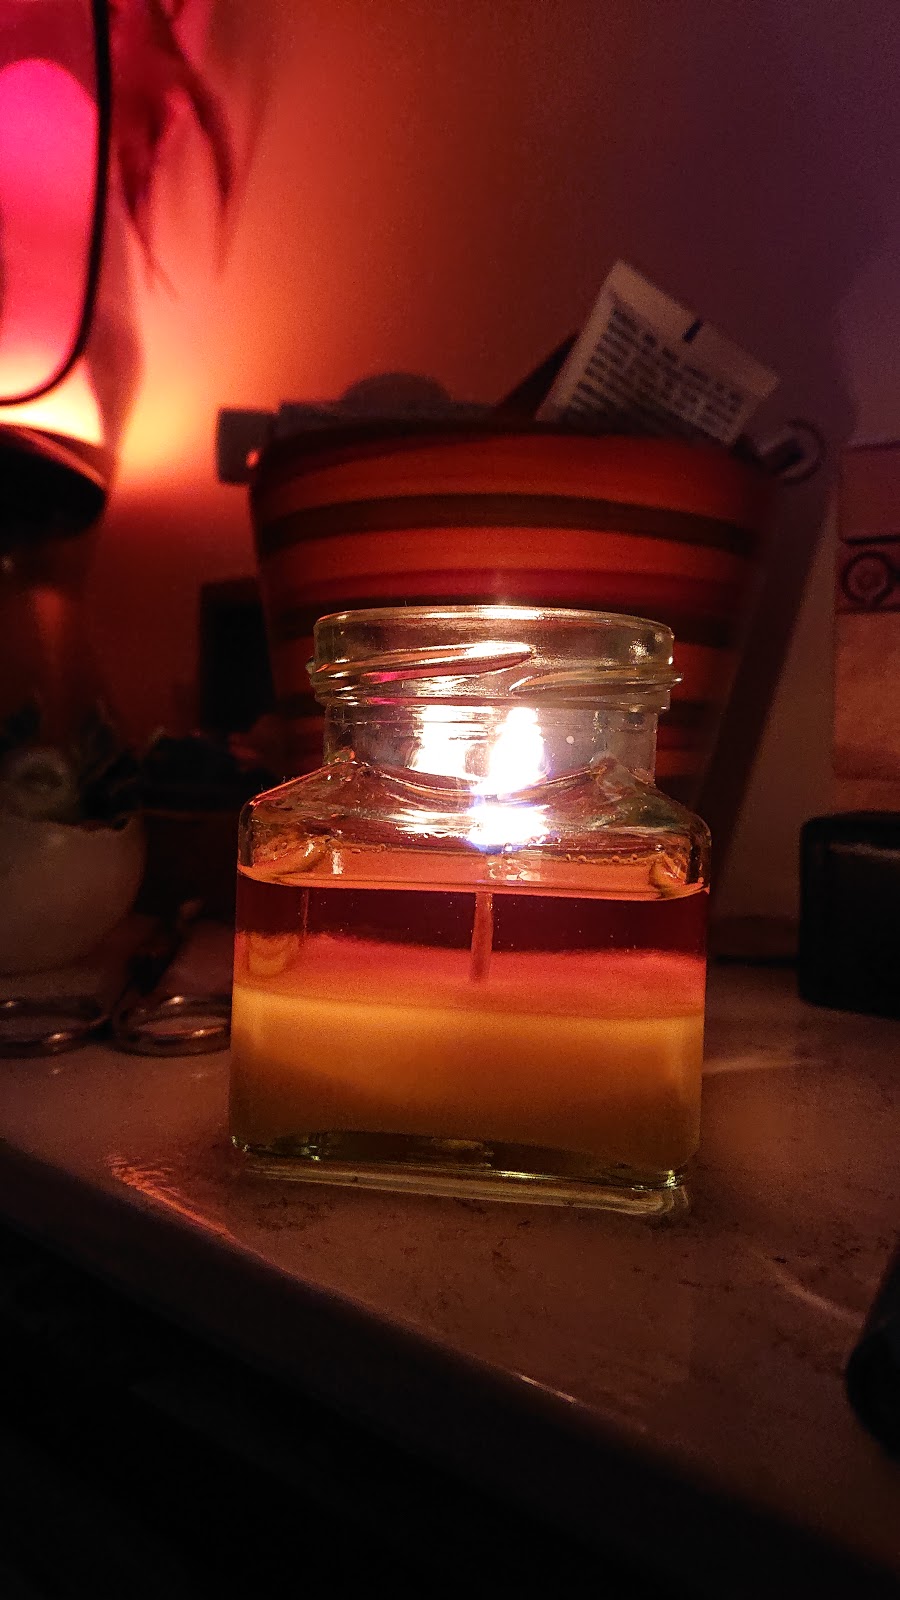
Candle bracelet friendship gifts
Watch this space for friendship bracelet candles, coming soon.
The chunkier cords work well for a single shell bracelet but I much prefer the light finer nylon cords for the more ornate jewellery.

White seashell bracelet on knotted black cord on cream background
The lighter cord gives me more scope for a finer macramé knot tube at the fastening end. I've also done a choker necklace version with a stainless steel adjustable fastening which I'm loving. I just need a sunny place to go away on holiday now - or better still, a boho music festival, where I can show off these bad boys!

white seashell necklace on black background


Friday, 15 February 2019

New! Edgy handmade beaded ammonite pendants

Peyote stitch has become a bit of a thing for me as I feel you've probably already worked out by now. A published knitting author and previously prolific workshop tutor, it was while teaching at a Craft Exbilbition up in glasgow that I was dazzled by a participant's necklace from across the room.

She pointed me in the direction of designer Laura McCabe, and the rest is history. I was hooked!

Peyote stittch is the art of weaving beads together to form a meshwork, a perfect way to bezel crystal rivolis, or indeed, anything.


After wearing my pendant around the office, it wasn't long before I was inundated with orders from colleagues for one of their very own. And that's when my ETSY shop was born.

Red choker crystal pendant on mixed race neck
My frustration at never finding necklaces in the lengths I want led me to string my own beads from a very young age.
Having gained a bit of confidence with the technique of bezelling using Peyote stitch, this year I started bezelling ammonites I had discovered last year on the Jurassic Coast, as well as others I'd collected from online sellers in Madagascar and India (just because they were pretty, really!)

I'd always loved the combination of blue and brown. This ammonite slice inspired me to take it to the next level using a Swarovski crystal ring.

Digging out spike beads from a failed design severak years ago that had been frustratingly shoved under the bed to gather dust, something really special happenned. These edgy, part art-nouveau, part punk pendants were born.

Inspired by the sun and the moon, to protect this limestone madagascan ammonite from damage, I've polished it and added a layer of glitzy gold wax.
I'm pretty convinced I've discovered a personal design style that I'm totally happy with and would wear any time. I've always had a mixture of weird shaped beads that I never knew what do do with. With these, I can be really creative and just let loose.

Hematite ring beads I'd bought years ago all of a sudden found a new lust for life, with a chinese bicone crystal at each centre.

Tuesday, 22 January 2019

Advice for new candle makers

So I used to make candles with my nan when I was a little girl. I quite vividly remember wandering to Woolworths with my pocket money, buying a milk pan and having a bash on my own (I can't have been older than about 11), and then tipping any excess wax down the sink.

Needless to say, my mum was less than impressed. And I was rapidly put off making them in case I broke the house by blocking the pipes again!

So yeah, when I spotted an unloved candlemaking kit knocking around on Shpock, it definitely sparked my interest.

Without batting an eyelid, I set to work and bashed out two massive batches of soy wax container candles. I used what I realised later, was Eco Wax 464 with a 5% fragrance load.

Having got enormously over excited at the outset, I'd also ordered a bunch of very unspecific wicks on Ebay. These all got mixed into the batches too.

So yeah, here is what I learned:

1. Unspecific wicks are pretty useless for making candles

Turns out there's a bit of science to candle making. Wicks that were supplied with the kit I bought, were specific to the type of wax used and the size of container. My duff ones all did something called 'tunnelling' (that is, burning by boring a hole down the centre of the candle and barely melting any wax around the edges) which also meant very little wax was melted and they didn't smell at all.

Although my research is yet to indicate what caused the bubbles in this candle, 
this is a better burn than my earlier tests - wax is melting to the edge and the 'milk pool' of melted wax isn't too deep.
I've since done bunches of research into which wicks I should be using and I'm as good as starting all over again, from scratch.
Wicks that are too hot for the container will blitz the scent too quickly as they melt too deep a milk pool.
I've been told 1/4 in maximum melted wax pool is the indicator of a good wick fit.

2. The same % fragrance load to wax ratio, doesn't work for every fragrance.

I just went straight in with my kit instructions and presumed that 5% of whatever scent, added at the correct temperature, would do the trick. It didn't.

I've now learned that Eco Soy 464 wax is generally a tricky one for getting a decent scent throw. I'm thinking next month I might swap to a different wax type, but apparently everyone has different preferences. I like the idea of soya as it's eco-friendly, but apparently a paraffix/eco mix suitable for containers (as it won't hold it's shape marvellously when used in moulds) might give me a better scent throw.

Did you know: It can take up to 10 days for a candle to fully cure. Candles lit before this time may have a tendency not to smell at all.

I could totally always try a higher percentage too, apparently 5% is pretty low.

3. You can't just go out and sell them

So there's a few things here.

Firstly, labelling. You need to display adequate safety information and any safety information about the chemicals you're using as fragrances, which are potential irritants. I splashed around ebay buying all sorts of candle scents from different suppliers and am now retrospectively having to go back to all of them to provide me with the necessary legal information which I must add as a printed label if I choose to sell them. Good to have on file, regardless.

Secondly, insurance. If someone burns themselves, or worse - starts a fire using one of your candles, you have to have insurance. If they take you to court without any, you're in trouble. UK insurance is pretty decent cost-wise but if you want to sell to America (which is 'high-risk'), be warned - prices skyrocket.

4. It's going to take quite a lot of experimenting before you have a product you're happy to sell

This is pretty much where I'm at. I'm not happy with what I've already produced and I only really sell stuff to raise money for charity anyway. So it's going to be a while before Freddie candles hit Etsy. For now at least! I'll keep you posted on how the process goes.

5. Decorations are potential fire-hazards

My friendship bracelet idea is still viable - but I need to add printed warnings to make sure people remove the decorations before they light the candles, Shown: Sea Breeze, Sandalwood.
I've got so many ideas for horror film-themed candles, father's day candles and spring botanicals ranges that I've gone off in all sorts of directions. What I've discovered is I need to reign it in and hone the basics first.

So if you're new to this like I am - my advice would be to be patient, do your research and leave plenty of time for curing and testing. Keep lots of notes and get all the information about any scents you buy up front. I'm going to wait until I've perfected the formula before I even start thinking about product design!

Good luck!

Wednesday, 9 January 2019

Hand-strung low cost freshwater pearls inspired by Jersey

Pearls have always caught my eye, ever since I was little.

But not traditional pearls.

I nearly always wear a black choker made from onyx, but pearls are so much more special.

After falling head-over-heels for a black pearl string I came across, I ended up teaching myself how to string them. And I'm happy to be able to now share my creations with you!

I was on Jersey a couple of years ago, writing an article for Woman's Weekly (absolutely amazing island, I can't wait to go back). In the airport on the way home, we were delayed, so I was blessed with a good couple of hours or so to parouse the airport shops.

My article for Woman's Weekly magazine

Dazzling in one of the jewellery outlets was a ethereal-metallic black pearl string with an irridescent finish. They totally spoke to me. I don't remember what they cost, but they were well out of my price league. Probably Tahitian pearls. I don't actually remember.

Those that know me will know I pretty much always wear a choker. I started off beading because I couldn't buy them anywhere in the right length (my neck is pretty narrow), so I gave up and started making them myself.

Naturally dyed using potatoes, these are known as 'peacock' pearls for the subtle and reflective cosmic blue, green and purple hues.
So after two years of persevering with what I can only describe as an 'extremely fiddly' technique, I've finally got the knack. And I have recreated that most gorgeous necklace that caught my eye.

I'm completely thrilled to finally be sharing them with you on my Etsy shop! I've found some amazing natural colours of pearl and just keep falling in love with them all. I'm just working on sourcing some nice vintage boxes and hopefully will be able to pack these up in the most amazing box too.

Saturday, 15 December 2018

Imperial Bauble by Julie Ashford - a Christmas gift for a friend

After a very lengthy ordeal with a very incompetent estate manegemtn agency, one of my colleagues exchanged on her brand new house a few weeks ago. I was so excited for her!

I really wanted to do something special for her, she's easily one of my favourite people. So when I saw Julie Ashford's brand new Imperial Bauble design pop up on Bead and Jewellery Magazine, I couldn't resist. I knew it was the perfect thing.

triangle beaded mesh with superduos and crystal rivoli, red and gunmetal grey
During the early making stages, I quickly fell in love with this medieval colourway

After ordering a kit from Spellbound Bead Co in the frosty white colourway (will totally make a gorgeous wedding gift for the next pair I know that gets married post-November), I got delving into colour options. I know my most popular colourways are always based on a custom order - usually colours I wouldn't normally put together.

So when this lovely lady said she was decking her new halls with red and grey, I set to buying every silver and red bead imaginable - whether it was needed for this stunning pattern, or not!

triangle beaded mesh with superduos and crystal rivoli, red and gunmetal grey
Like, I've never seen Game of Thrones, but this is Game-of-Thronesy, right?

I ended up going for a red bauble, with red Swarovski crystal rivolis and pale grey rondelles. And from the bottom of my stash I'd dug out some gunmetal-coloured size 8 beads to set the whole thing off. At least, I thought they were size 8's...

To form the curvature of the waves around the bauble netting, a variety of different seed bead sizes are used. I've nmever had more respect for Julie Ashford as I now do, having made one using one bead in the wrong size.

Bauble with red and grey crystal beads in-progress with scissors
The superduos stand upwards like a crown around the bauble ring


The result of my aforementioned error, was such that the mesh barely fitted around the bauble. Swarovski rivoli backs are foiled, pointed and a little sharp. So the result of squeezing this poor little bauble into the netting, was unsurprisingly, scratches all over the bauble. Doweth.

To shield my lucky recipient from this clunky incompetence, I used some beading glue to hold the rivolis in place over the embarassing scratches.

Totally worth it. I'm thrilled with the finished result.

I'm pretty happy with how it turned out, even if the other half decided that it looked like 'something the devil would hang on his Christmas tree'. Why would the devil have a Christmas tree in the frikking first place??!

Merry Christmas, everyone! Freddie

Saturday, 10 November 2018

Fossil hunting in Durdle Door, England - an attempt

As a child I collected seashells (which alarmingly back then also included corals - thank gooness that doesn't happen any more!). And spent many a summer on the Isle of Wight - which is chock-full-o-fossils.

I've always loved nature, I guess - now working at ZSL London Zoo, I'm famously the only weirdo in the office more interested in the bee species flying around the Zoo than the large mammals on show. And proudly so.

My unloved wide angle camera lenses got a real run for their money with this breathtaking scenery.
 A trip to UNESCO world heritage site Durdle Door, on the southern Jurassic Coast of England, seemed right up my alley. Foraging for hundreds-of-millions-of-years-old remnants of aquatic creatures against a backdrop of night skies glittering with stars away from light pollution? It wasn't a hard ask.

I love seeing England anyway. I'm not enamoured by sweaty sunburnt trips abroad.

We booked 5 nights at a camping pod (even the park owners seemed surprised by that decision) with nothing but a few books, a chess set, my camera and of course each other, to keep ourselves amused of an evening.
Venturing south in October meant we pretty much had the park to ourselves
It was fantastic. Upon arrival we couldn't wait to make the short (but incredibly steep) hike down to the beach to see what we could find.

The beach is filled with rocks to investigate
We spent several hours in our wellies bashing through chunks of chalk on the beach, picking up pebbles and chucking them back. By the time the tide turned to come in, we'd found nothing.

Or at least, we thought we hadn't.

Several days after returning, we had a squiz round Google and found that the markings on nearly every stone we found were indicative of treasured trilobites within. If only we'd bothered to look at how to find fossils before we went.

It's our style to chance things, and I've since found a fabulous forager on eBay who knows what she is doing. Thankfully she is a frequent finder and is able to supply me for my handmade fossil jewellery. Sadly the vision of my finding my own, was short-lived!

This Jurassic Coast fossil had a small hole at the centre which I plugged with an emerald Swarovski crystal.
You should know that there are plenty of tours on offer with fossil-finding experts while you're down on the Jurassic Coast. While I haven't tried one, anything has got to be better than the nothingness we experienced! Give it a go. We had fun regardless but it would be all the more rewarding to actually come back with a find!

Friday, 12 October 2018

Freshwater pearls you need in your life

I'm not a big fan of pearls. I mean, I am. I admire them mainly from afar. But where my go-to necklace is a black onyx choker that I wear pretty much every day, when it comes to me choosing colours it's go dark or go home.

That being said, I do find myself staring at a string of glowing ivory beauties when someonepairs a string with a vintage 50's dress, or better still, jeans and sneakers.

Pearl necklace with silver ball clasp wrapped in two concentric circles on a black background.
Classic freshwater pearl necklace on 925 sterling silver push clasp
When I first bought pearl beads, I bought them because I'd seen a necklace that I fell in love with, and planned to make one myself.

I wanted it, and I wanted to recreate it. And when I did it, it was worth it.

I can honestly say that when I did finally get around to learning how to string them (some 4 years later after many failed attempts), the finished pearl necklace was ten times better than the lacklustre original I'd spotted in a jeweller's.

pink, peach and cream strung pearls on pink silk knotted, on black background
I was amazed at the variety of natural shades available. Pearls really are amazing.
It is always my habit to follow a successful project by binging on materials as if I were going to repeat the process ten times over, which nearly never happens. This particular bead binge really opened my eyes to some of the pearl colours available.

I don't know why, but I'd always presumed it was just white and black that was available. I hadn't considered anything in between.

pale grey pearls on knotted grey cord with shiny round silver clasp on black background
I adore these pale silver pearls. I have visions of a bride wearing them with a crisp white dress and simple silver earrings.
What helped me fall lustfully in love with the above pale grey pearls, was their perfection in shape and colour. I have never liked gold, I'm very much a silver girl, and these really speak to me.

I reckon a group of bridesmaids would look stunning wearing these with a satin grey simple gown. They'd look amazing!

mesh silver clasp with dark blue pearls on black paper
This filigree stirling silver clasp really sets off these unusual dark blue pearls.
And then the colours available in dyed versions are endless. Usually dyed using potatoes, look out for red, black peacock and even navy blue pearls. Just as authentic as the natural peach, cream and grey shades, these pearls are arguably more modern, vibrant and open the door to some major custom options.

What colour would you go for?

Friday, 15 September 2017

Swarovski Stardust-inspired necklaces and bracelets now in the shop

So I was at a craft show when I learned how to fill nylon tubes with pretty things to create pretty jewellery. They taught me how to crimp the ends and add a clasp - something I've never been able to fasten myself on a bracelet. They're a right pain.

When I saw that Swarovski were creating something similar, I immediately fell in love with the clasps they'd chosen to use. They were chunky and shiny and pretty, and didn't look fiddly at all.

Double-wrap ombre necklacxe with silver magnetic clasp
The magnetic clasps make life so much easier!
So I started Googling around for some magnetic clasps that would fasten themselves and lo and behold, they're everywhere! I ordered a whole bunch and before I knew it the arthritis-stricken and fidlly-feebled family members around me were all putting in orders for their Christmas pressies.

I was surprised, I thought that they might look too chunky, but I soon found myself wearing them too. Generally a fan of choker-length necklaces, I quite like them to sit just above the collarbones, so I make them all that length although of course I can customise them for different peeps! Here's me on my birthday (NYE) sporting one. I love glittery things (total magpie) and they go quite naturally with casual outfits as well as smarter ones which are good!


So yeah, they've been pretty popular. I've got all sorts of ombre versions and silver iterations now on my etsy shop (and all for £12 and under!). Silver seem to be the most popular colour for tubes although I am deffo a favourer of the jazzier ombre ones! Hope you like them.

Double-wrap silver Swarovski Stardust bracelet with magnetic clasp
Wear them as a double-wrap bracelet or armband, or a single-wrap necklace


Friday, 7 July 2017

How to dye yarn - a guest blog from Heike Gittins of madewithloops.co.uk

Colour at my fingertips!


My love for all things textile began when I was a little girl in Germany and I was taught to knit and crochet by my grandmother’s. Ever since then I have had a close relationship with yarn and colour, and in recent years I have been lucky enough to fulfil a long dream turning my passion into a small business madewithloops.co.uk

Living in Wales has meant being surrounded by sheep and I have watched them being shorn, the fleeces being washed and carded and I have been on a spinning course learning how to transform fibre into yarn.

There was only one thing missing: Learning how to dye!


My chance to go full circle came when a friend of mine invited me to accompany her to Denmark where she was teaching a three-day workshop on dyeing yarn using natural and synthetic dyes. Of course I jumped at the chance!

The Baltic coast holds a special place in my heart having spent many childhood holidays there with my family. To this day I favour simple design lines that are often influenced by Scandinavian styles and I was looking forward to the trip with joy in my heart.

The venue for the week was high up in northern Denmark in a beautiful setting, with a specially planted dyeing garden, which was in full bloom during the workshop, and even had it’s own dragon spewing water!

Beautiful flowers in Denmark gardens


During the next few days we were given an overview of dyeing with natural materials such as logwood chips, walnut and cochineal beetles, as well as using some ready made synthetic powders.

We were taught the importance of setting up the workspace, dye baths and preparation of yarn ready for dyeing.

How to set up a dye bath


The importance of choosing dyestuff and yarn carefully became clear to us very quickly as we learned that it is comparable with choosing ingredients for a favourite recipe: everything must be in harmony with each other in order to get the result you hope for and end up with beautifully coloured yarn that you will want to work with.

As I prefer working with natural fibres so I chose two different yarns to dye: 100% Baby Alpaca and an 80% Wool/20% Silk Mix.

I tried various techniques of dyeing, some more messy (walnut bath) than others, and I also used some of the dye baths more than once achieving strong to faded colours perfect for ombre knitting.

Planning colours for yarn dyes


After working with natural as well as synthetic dyestuff, practising anything from circus bright’s to subdued and tonal colours, the icing on the cake was trying our hands at indigo dying.

For this exercise I chose to dye a beautiful lofty Kid Mohair yarn, and not only was the playing with tie-dyeing indigo immense fun.

The end result was stunning!

Beautiful yarns dyed by Heike Gittins
As always when you are having so much fun time flies by and before we knew it we had to tidy and wrap it all up.

During these few days I made new friends, laughed a lot and learned a lot, and by the end of it I came away with a suitcase full of yarn all hand-dyed by me and now waiting to be made into beautiful items.
-->
I better get to it!

Heike x

Tuesday, 13 June 2017

Using Long Exposure Photography at The Ingleton Waterfall Trail

I love The Lake District - I've been about three times and can't soak in those amazing views anywhere else in the UK. It's incredibly special. On my last trip I was lucky enough to see some of the geological beauts of the area, notably at the Ingleton Waterfall Trail.

Slow exposure photography of Hollybush Spout waterfall
Hollybush Spout - just getting the hang of the slow exposure here
I've been banging on for ages now about my misgivings with switching from film to digital photography, so on this trip I was really torn. 

On a long hike (about 8km, not huge but long enough) - I didn't want to be bogged down with loads of gear, so my Minolta Dynax 9, although perfect for the journey - couldn't come with me. It's a mammoth amount of weight to carry. 

I had a nice little travel Manfrotto Compact Action tripod which was perfect. It's the lightest I own and fits snugly into my rucksack.

Instead, I went for my trusty shoot-from-the-hip Minolta Dynax 60 (it's super light!), my Sony a77ii digital SLR and quite a large selection of lenses including a super-wide and a wide angle Sigma lens. Retrospectively, I probably didn't need both. I ended up using my 12-24mm nearly all of the time.

River rapids approaching Thornton Force Ingleston Waterfalls Trail
Quite a few of these pictures were achieved without the use of a tripod
So I was set! The difficulty with places like these though, and you will see it if you go - is that on such a busy walk (it's very popular), you're very nearly always in someone's way when you stop to set up for a photo.

I in fact, didn't find anywhere to stop where I wasn't in anyone's way - until nearly halfway round the walk (it's a circuit) that I found the space to put my tripod up.
Ingleston waterfall trail Thornton Force taken with slow exposure
Thornton Force was another great place to stop - had a fabulous time playing with both film and digital here

So adjusting my ND filter and faffing about with my tripod (which, TBH - probably should have practiced using before arriving here) became very tricky. All of a sudden I found myself reserving the use of my precious camera film and shooting willy nilly, utilizing the Sony A77ii's automatic long exposure settings.

I now feel like a big chicken. The Thornton Force waterfall, above - had great space. And I'd had plenty of other waterfalls where I'd had time to practice the long exposure settings on the digital camera. So by the time I got here, I felt like I was in a good place to start putting exposures on my Ektar 100 film which I'd purchased specifically for this trip.

Thornton Force waterfall with slow exposure
It was very freeing to not need the use of my tripod
I took so few, in fact - that I'm now stuck with half a roll of Ektar 100 still in my camera.

Having read the exposure from my Sony, I was simply copying the settings on my film camera to achieve what I'm hoping are very successful photos. In truth, I have no idea. And now won't until I find another set of green things or landscapes, on which to use up the rest of my film.

Snow Falls Ingleston Waterfall Trail long exposure
Snow Falls - my favourite of all the shots. Again, no tripod.
 My favourite shot was taken leaning my camera on the edge of the bridge we happenned to be crossing. I only had a minute or two to stop before I would have started holing up the other walkers, but by this point I'd become the laziest ever - and had just the Sony on the go.

What I really felt I was missing though, was my The Pod, which, like a total numpty I'd left at home.

Short of space and on the go, It's a great alternative if you don't have room for putting up a tripod. I could have used it all day.

Ingleston Waterfalls Trail long exposure
This was just a trickle - one of my fella's favourites of all of my shots
My overall opinion is that the Sony a77ii's long exposure setting is pretty darn lazy. You do need to have some knowledge of how to use your polariser and ND filters before you go at it though, so I don't feel like a total dummy.

Take a beanbag tripod with you - it does need a certain amount of stability. But the ability to preview how your exposure will look, means that swapping over to manual settings becomes incredibly psychic.

Yes, I have a bit of colour distortion from the long stops I was using. I don't mind it, I think they're pretty moody. But please please please don't give up on film completely. It would break my heart!

Thursday, 13 April 2017

Freddie Patmore - the Harrow photographer

Although my speciality has and always will be, knitting and crochet, those of you who know me well will know that I've been photographing in and around Harrow in NW London for decades.

Ever since I studied photography at Harrow College, I have had periods of total obsession with my camera. It's my second set of eyes.

How the fella ever put up with me following him around poking a Minolta Dynax 60 in his face when we first met, I'll never know. But 12 years later he's still here, and I've got some great shots of him from back in the day. Mostly in and around Harrow.

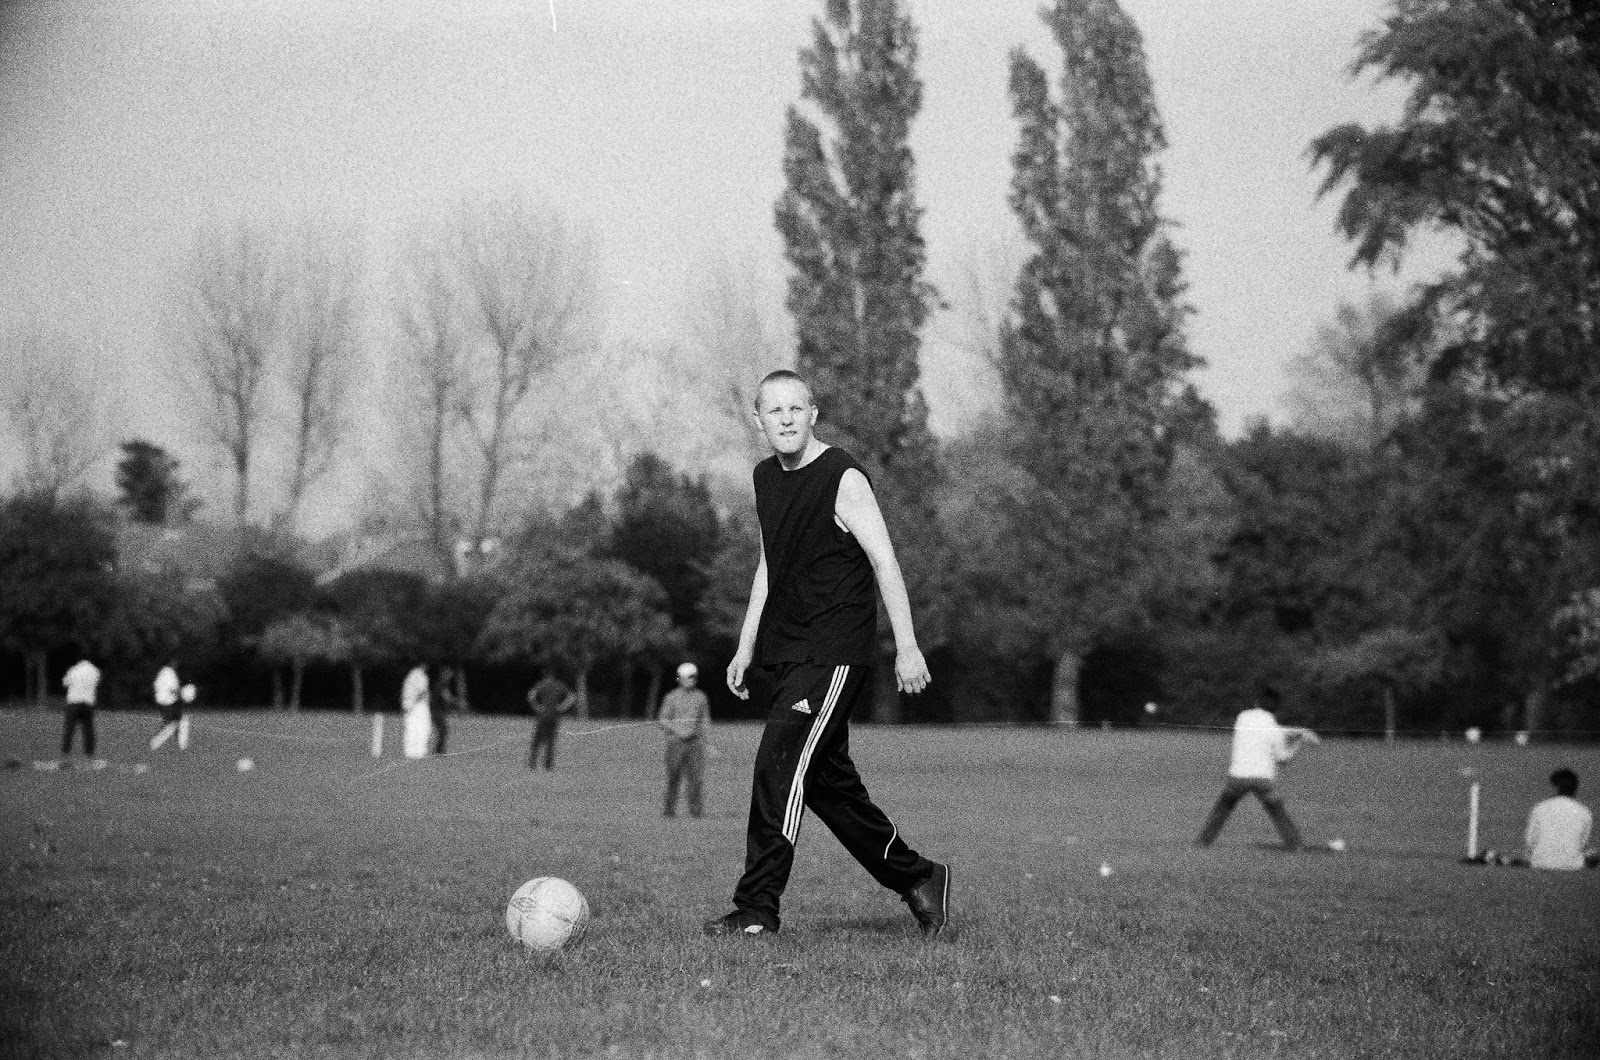
My favourites were one of my first shoots with him, a kick around in Byron Park.

They're pretty basic. I went armed with a nice roll of Ilford HP5 400 B&W film (the bestest in the business), my cheapo'beercan'  zoom lens purchased at a second hand camera shop in Rayners Lane and a fast shutter speed. That's all it took.
playing football in byron park man with ball
One of my favourite ever shots of Ben. I love the look of film photography and always have.
All that remained was to find a good view point.

By the by, I acknowledge the vignetting in the above shot - know that I was 18/19 and had no idea how to handle this extremely long lens. I like how it frames it, actually.
man dives for football save
Ant was always landing in interesting positions, they made for fab pics.
I won't lie - there were times when I feared for the safety of my camera. One swift hit of a ball on my gear could have all been the end. But my was it worth it.
man playing keepy uppy in the park with football
I recently rediscovered the scanned negatives on disc - so glad I thought to do it back then.
I have recently made the swap to digital and although I was trepidacious at first, the expensive cost of film developing recently really has left me with no option.

I can't ditch film completely, it's what I know and love. I know how to handle it. But it's about time I stepped into this century and kept up with the game.

man falls down in goal byron parkgoal keeper throws ball in byron park harrow
Since then I've gone on to do weddings (good fun, actually) and the occasional portrait shot. But the camera did have a few years of sitting in a dusty box until I could musterf the budget to pay for pro film developing.

A recent play around with Kodak Portra 800 left me with an eye-watering bill of over £60 to develop two rolls with an extra set of each. It's an awful lot to pay if you're not even sure you're happy with the final outcome.

professional photograph of two men playing football in the park
Getting a low viewpoint lends a more dramatic composition
But luckily with these, I was. Harrow is a great town and I love to call myself a Harrow photographer. I've had a great many opportunities to capture the beauty of the place I grew up in, and relish any opportunity to go on doing so.

Thursday, 23 March 2017

Knitting and crochet workshops I'm teaching 2017


I'm very excited. starting in April I've got a whole bunch of upcoming knitting and crochet workshops running in conjunction with The Knitting Network and Woman's Weekly Magazine.

All held at our sparkly new headquarters at Marsh Wall, Canary Wharf - do drop in for a fun workshop if the mood strikes you, it would be great to see you. Details below (links to book are on the dates, or you can ring 0800 024 1212 and book over the phone).

Learn To Crochet

Fridays 28th April and 23rd June (10.30 - 4.00)

I really love teaching these - it's so rewarding watching people who have never crocheted before learn to tame a hook and create fabric.
 This jam-packed day is a start-to-finish introduction to crochet for those who have never held a crochet hook before, or who’ve tried but need to check their technique or get a refresher. Join our experts for our most popular workshop – places fill up fast – so book your spot before they’re all gone.

Arm Knitting Afternooner

Wednesday 9 August (12-4pm)

I was totally not convinced by arm knitting at first but it has it's place for super speedy, humongous projects. It's certainly a fun and very sociable activity, many people come as a group for this one. 

Join me to ditch the needles and go all arms for this fun new technique for giant and super speedy knitting. Be prepared to get your upper body moving with many people preferring to stand while their giant pieces of fabric, form. Make yourself a snood and try your hand at some other shapes and sizes. No knitting experience required!

Professional Finishing For Knitters (Intermediate)

Friday 14th July (10.30am – 4.00pm)

This is a classic rehash of an old favourite. Professional Finishing is a great course if you've started knitting garments but they're looking a bit wonky. This day tends to shape itself around the questions posed by those attending so it's quite flexible.


Aimed at those of you who know the basic knit and purl and can read and understand a pattern, this is a great day out to sort out any niggles you’ve come across at the final stages of a project. Learn to pick up stitches without forming any gaps, banish bizarre buttonholes, master invisible seaming and get your teeth into some spectacular shaping exercises. Participants will need to bring 3 x DK 10cm knitted squares in stocking stitch.


First Steps In Crochet (Total Beginners)

Friday 11th August (10.30am – 4.00pm)

Similar to my Learn To Crochet day, this full-day course is also aimed at total beginners. But there's some bonus things if you fancy doing both this and the following course.


Get to grips with how to handle your crochet hook and yarn, master a variety of stitches and tackle reading patterns with a selection of projects to try in the afternoon. Those attending the course on the following Monday (see below) will be assigned some bonus activities (yes, there's homework) to take away with them and practice over the weekend.

Motifs, Mandalas and Granny Squares (Beginner to Intermediate)

Monday 14 August (10.30am – 4.00pm)

An ideal next step from First Steps In Crochet day (above), join our experts to put the basic stitches which you already know into practice with some stylish circular projects to develop those pattern reading skills.

Add a flourish of colour and texture to a variety of granny squares, circular mandalas and pretty motifs. A perfect day to pop along to if you’re partaking in our current Collect and Create series in the WW Knit and Crochet Monthly.


Knitting With Colour – Fair Isle and Intarsia (Intermediate)

Friday 6 October (10.30am – 4.00pm) 

Last time I taught this course we had a ball! No pun intended, of course.

The day kicks off with a comprehensive morning of Fair Isle techniques (it's tricky, so best to do this while you're fresh!). There are three main ways to hold your yarn while working and I like to let everyone try all three, and then move on to pick one which suits them.


In the afternoon, we ease off into Instarsia country. Starting with knitting an initial of your choice, and hopefully finishing it when you leave.

Never be bothered by a complex looking picture knit or complex colour project, ever again. I always think this day is pretty fun.

First Steps In Crochet (Total Beginners)

Thursday 9th November (10.30am – 4.00pm)
  
Similar to our Learn To Crochet workshop, this full-day course is aimed at total beginners. 

Get to grips with how to handle your crochet hook and yarn, master a variety of stitches and tackle reading patterns with a selection of projects to try in the afternoon.  

Those attending the course on the following day will be assigned some bonus activities to take away with them and practice overnight, if they wish.


Poppy Brooch Crochet Workshop (Beginner to Intermediate)

Friday 10th November (10.30am – 4.00pm)

An ideal next step from our First Steps In Crochet day , join our experts to put the basic stitches which you already know into practice with some very special flower brooches to develop those pattern reading skills. 

Proudly wear your WW Poppy in memoriam for Armistice Day, (the following day). 

Those who finish their poppy during the day will have the opportunity to make more than one, or choose from a variety of other pretty flowers to make.